Seeed XIAO nRF52840 Sense 🍀
Seeed Studio XIAO nRF52840 is equipped with a powerful Nordic nRF52840 MCU which integrates Bluetooth 5.0 connectivity. Meanwhile, it has a small and exquisite form-factor which can be used for wearable devices and Internet of Things projects. The single-sided surface-mountable design and the onboard Bluetooth antenna can greatly facilitate the rapid deployment of IoT projects.
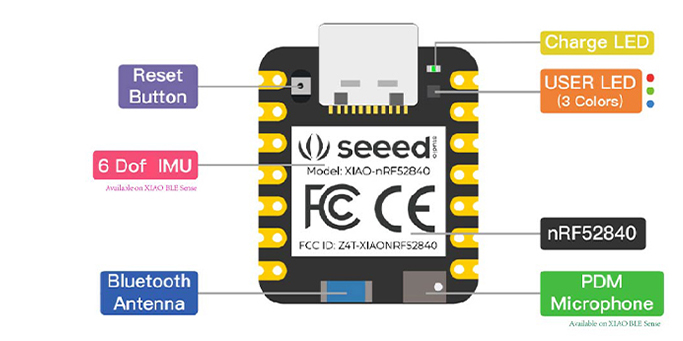
We are using the Seeed Studio XIAO nRF52840 Sense for the tinyML workshop. It is integrated with two extra onboard sensors. One of them is a Pulse Density Modulation (PDM) Digital Microphone. It can receive audio data in real-time which allows it to be used for audio recognition. The other one is a 6-axis Inertial Measurement Unit (IMU), this IMU can be very useful in TinyML projects like gesture recognition. These onboard sensors provide a great convenience for users while the board is ultra-small.
Features
- Powerful wireless capabilities: Bluetooth 5.0 with onboard antenna
- Powerful CPU: Nordic nRF52840, ARM® Cortex®-M4 32-bit processor with FPU, 64 MHz
- Ultra-Low Power: Standby power consumption is less than 5μA
- Battery charging chip: Supports lithium battery charge and discharge management
- Onboard 2 MB flash
- Onboard PDM microphone (only in Seeed Studio XIAO nRF52840 Sense)
- Onboard 6-axis LSM6DS3TR-C IMU (only in Seeed Studio XIAO nRF52840 Sense)
- Ultra Small Size: 20 x 17.5mm, Seeed Studio XIAO series classic form-factor for wearable devices
- Rich interfaces: 1xUART, 1xI2C, 1xSPI, 1xNFC, 1xSWD, 11xGPIO(PWM), 6xADC
- Single-sided components, surface mounting design.
📍 Install the Seeed XIAO nRF52840 Sense on Arduino IDE
Step 1: Install Arduino IDE v2.1.1 in your computer from here https://www.arduino.cc/en/software
Step 2: Add Seeed Studio XIAO nRF52840 (Sense) board package to your Arduino IDE
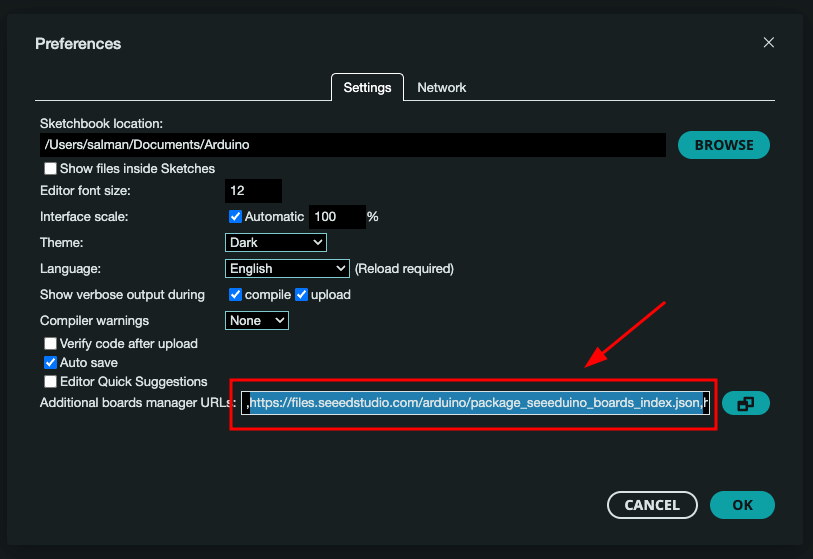
Navigate to File > Preferences, and fill "Additional Boards Manager URLs" with the url below: https://files.seeedstudio.com/arduino/package_seeeduino_boards_index.json
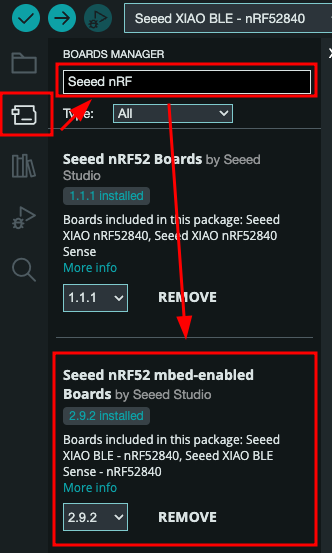
Navigate to Tools > Board > Boards Manager..., type the keyword "seeed nrf52" in the search box, select the latest version of the board you want, and install it. You can install both.
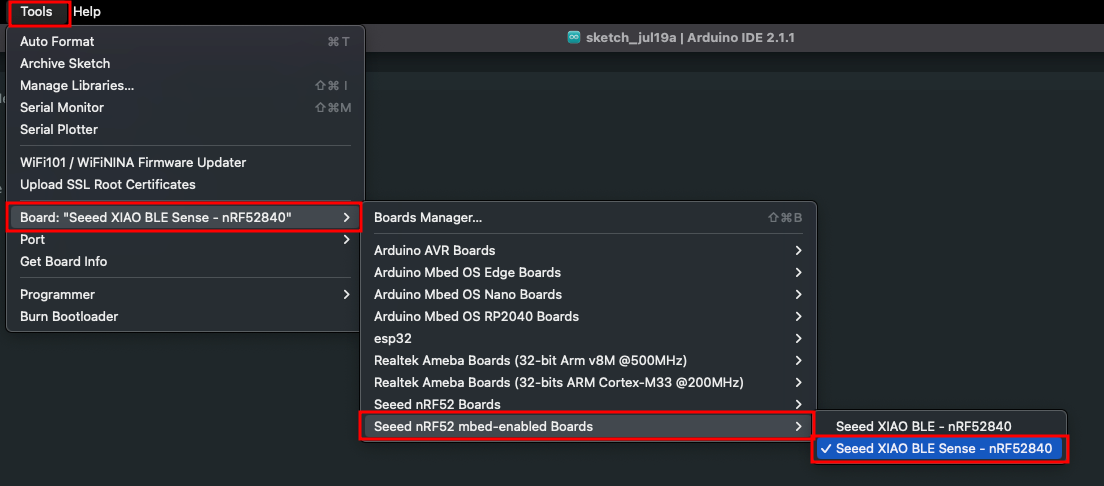
Step 3: Select Seeed XIAO n0F52849 Sense board
After installing the board package, navigate to Tools > Board and choose the board you want, continue to select "Seeed XIAO nRF52840 Sense". Now we have finished setting up the Seeed Studio XIAO nRF52840 (Sense) for Arduino IDE.
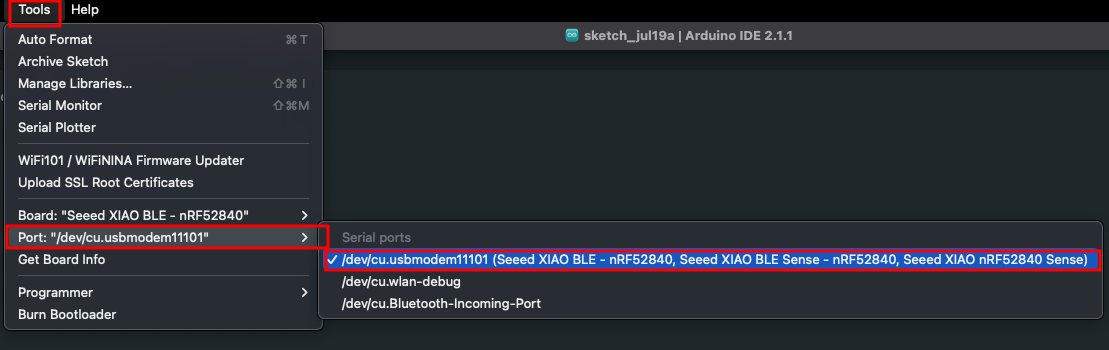
Step 4: Select Correct Port
Navigate to Tools > Port and select the serial port name of the connected Seeed Studio XIAO nRF52840 (Sense). This is likely to be COM3 or higher if use a Windows OS (COM1 and COM2 are usually reserved for hardware serial ports) or it will be as below image.
📍 Run Blink sketch on Seeed XIAO nRF52840 Sense
To make sure the board installation and board looks good, we can try to run a program to blink onboard LED from the XIAO as hello world program and test.
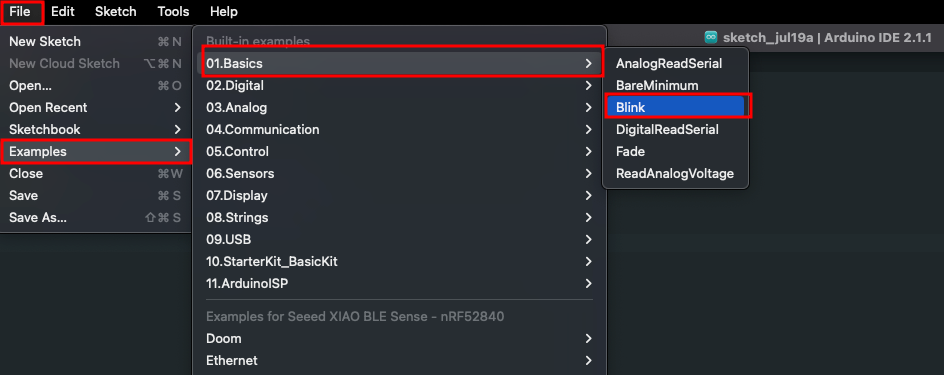
Step 1: Open Blink Sketch from example
Navigate to File > Examples > 01.Basics > Blink to open Blink example.
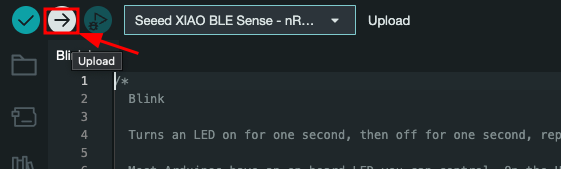
Step 2: Upload program to the Board
Click the Upload button to upload the Blink example code to the board.
Once uploaded, you will see the built-in red LED blinking with a 1-second delay between each blink. This means the connection is successful 🎉 and now you can got to the next session.
ToDo
- Install Seeed XIAO nRF52840 on Arduino IDE.
- Connect board with computer and select correct port.
- Upload blink sketch to the board without errors.